XpandGirth, adapting the adjustment straps, disassembly and cleaning

In this post we will explain you how to maintain the most innovative girth on the market, the XpandGirth.
In order for both you and your horse to enjoy each other to the máximum of riding, it is necessary to know how to adjust the regulation straps correctly so that your horse can breathe freely and have freedom of movement. The same happens with cleaning, it is necessary to have the girth cleaned so that it maintains its properties. We have to learn how to keep it spick and span and how to disassemble it and clean it again, of course! We explain all this below.
Adapting the adjustment straps
The adjustment of the XpandGirth regulation straps seems more complicated than it is, here we tell you how to do ir correctly!
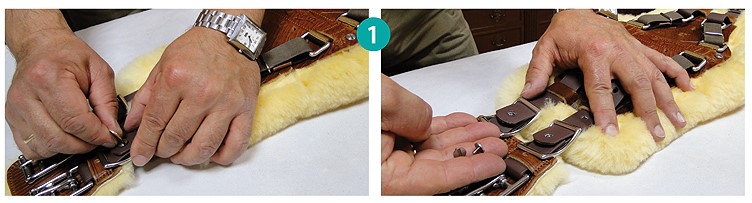
1. With the help of a coin or screwdriver, remove the screws from the double pass buckles that regulate the adjustment straps. In Slim model, remove the adjustement screws.
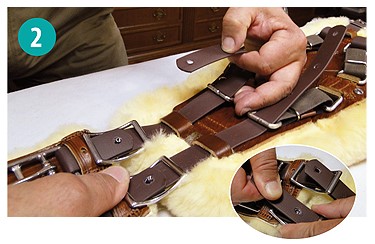
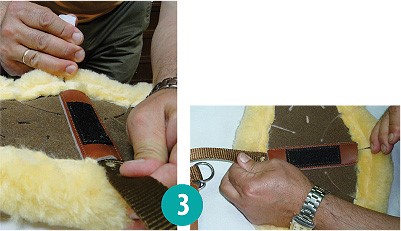
2. Adjust the length of the straps and select the hole that best suits the size required.
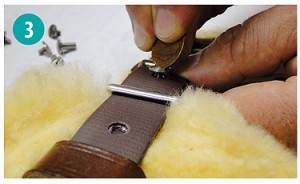
3. Replace the screws so the straps remain fixed and repeat on the opposite side of the girth.
XpandGirth cleaning:
Keeping our girth clean is essential to be able to enjoy it for as many years as possible, here we explain you how to disassemble, clean and reassemble it to keep it pristine:
Dissassembly:
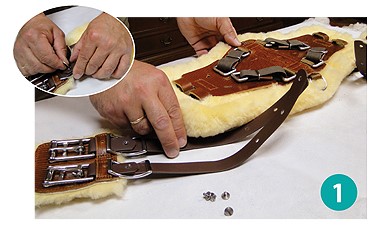
1. Remove the screws from the double pass buckles or, in Slim model, the adjustement screws to take the adjustment straps out from the body of the girth.
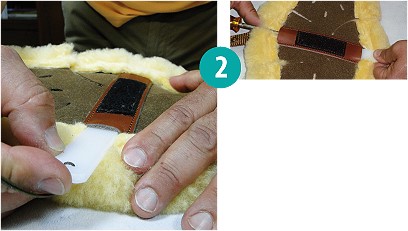
2. Remove the central screw that joins the two bodies of the girth and take off the velcro that holds them together.
3. Remove the fastening strip and separate both parts to wash/clean them independently.
Cleaning:
Cleaning the protector:
The medical sheepskin, neoprene or elastotex protector must be hand washed or machine washed, with neutral detergent, on a gentle cycle, with a maximum temperature of 30 °C.

Cleaning XpandGirthNatural sheepskin protector is recommended to wash by hand and use a special detergent for sheepskins.
But beware! if the protector is made of leather it can’t be washed in this way, you have to follow the instructions for cleaning leather hereunder.
Cleaning the leather:
You have to use a leather cleaner to remove remainders of sweat, mud, etc. Once this step is done is necessary to enrich and nourish the leather with a leather conditioner. We recommend you to apply both products with a sponge for better absorption and a perfect finish. Your girth will be like new!
Assembly:
Once we have our impeccable girth, it is the perfect time to use it again. These are the steps to follow to leave it as if nothing had happend:
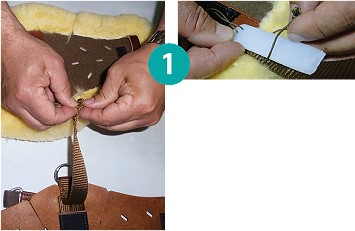
1. Pass the plastic rigid piece by the cord previously passed by the central nylon strip eyelet.
2. Insert the rigid piece through the central leather keeper of the girth, which is joined to the protector.
3. Pull the rigid element to let the nylon strip cross the central leather keeper.
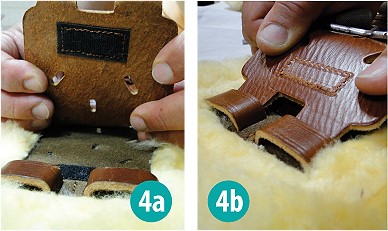
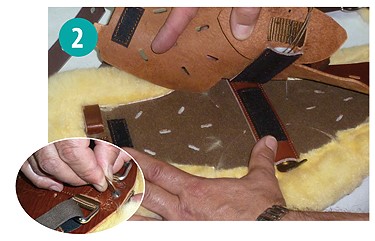
4a. Superimpose both bodies to make the velcro pieces match together.
4b. Insert the tabs of the upper body in the lateral leather keepers of the underneath part.

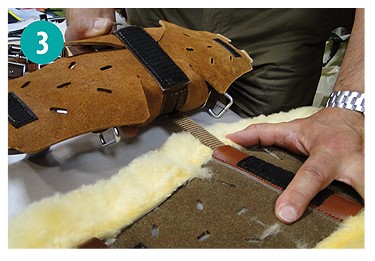
5a. Bring the female ending of the central screw in the body of the girth which is matched to the protector.
5b. If you want to keep the rigid piece joined to the girth, attach the cord to the eyelet of the fastening nylon strip then put it inside the central leather keeper.
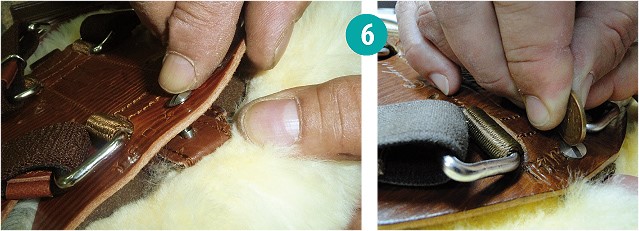
6. Place the upper body of the girth and insert the male ending of the screw to fix both parts of the girth. Screw with the help of a coin or screwdriver.

7. Attach the strap from the trapezium to the buckles and adjust its lenght according to the instructions to the section “Adapting the adjustment straps”.
Comments
No comment at this time!
Leave your comment